Thursday, March 29, 2012

Kitchen Shenanigans

Trying to prepare the counter properly so that the sink can be installed and hooked up. One more step toward water.
I got artsy and set the tiles on point ... mostly so they would not have to line up with the rows of floor tile that are not yet down. My sister had her wet saw available and loaned it to me.... so I embarked upon my first foray into cutting my own tile.  I was masterful if I do say so myself. I no longer have to return to Lowes in order to have the flooring dude cute my tiles for me.... I think he was tiring of me. I am now independent regarding cutting ceramic tile.


I've decided to pull the tall cabinets off the wall.... just as soon as Rick returns for the plumbing wrap up. I am going to ask him to yank those off the wall for me. Currently compiling a list of "Rick jobs"... which helps me get more of my jobs done more efficiently and easily.

I believe I will stack the tall cabinets together and utilize them as a cabinet that rests on the floor.

I want to put up something a bit more accessible for kitchen stuff.... something light and cheery... maybe..... something open like....


... one on either side of the kitchen windows

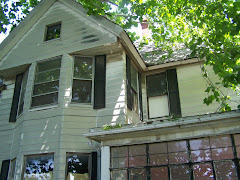
In order to utilize these I will have to take the woodwork from around the windows... but that's cool... the kitchen windows are strange... and will need a redo that will vary from the rest of the windows in the house.

I helped my sister dump the demolition debris from her renovation project into a dumpster this week.  It took us about 6 hours to fill up the huge dumpster with all her plaster, paneling, lumber and random debris caused by her tearing out all her walls and ceilings.


I WAS rewarded because she happened to have removed some super thick drywall from one of her rooms... intact... in whole sheets.... perfectly reusable... thus, I am going to repurpose her drywall into the beast .... and finish up the utility room/bathroom... with said drywall. Big score....

Monday, March 26, 2012

Rock On!

I had more rocks delivered for the driveway.... took me most of Sunday to toss around the leftover pile because the delivery dude wasn't able to tailgate all the way to the end of the driveway due to the tree branch being in the way.
No problem though.... just took a shovel, a rake... and a little bit of time.  No more driveway mud pits. So far I have made use of 30 tons of rock.

Wednesday, March 21, 2012

Problem Solved

I couldn't find an appropriate drain for the vanity... at local stores... because this was made by Crane in the 1950s.... it has an oversized opening.

 I had to consult my good friend... Google.... and find the right part.
Googling vanity drains didn't work because all I got was plumbing parts for plain, ordinary modern day plumbing fixtures.

So, I thought about it and decided I should look for plumbing supply companies located on the east coast where it would be normal for people to be gentrifying neighborhoods which were 200 years old... and renovating a 'this old house'.

Found what I needed at The Renovator's Supply Inc....BINGO.... another step closer to water.


Tuesday, March 20, 2012

Schedule....

OK... I feel better now... I've blogged up to date a bit... probably more to tell but that's all for the night....
More big stuff to come in the next few months.... after finishing the plumbing....

1) Rewire upstairs.
2) Install first floor furnace.
3) Build floor to ceiling library bookcases.
4) More windows.
5) Fence for Pearl.
6) Roof for garage.
7) Wrap around deck/porch.

Busy days... busy people.

Pearl....

Gotta go home and see my Pearl tomorrow.... love this dog... gotta get a fence up and get Pearl to ride in the truck so she came come with... .. big old dog.

Tripping the Light FANtastic....

OH... I HAVE gotten some fans and lights installed.... Here's Rick's bro, Bill  finishing up the install of my dining room fan/light... which I especially like...


I think it's pretty....
Here is daredevil Thomas... one of Rick's helpers... installing my stairwell pendant light...I snapped a picture quick and left the scene... couldn't watch the balancing act....  
Ta Da
first bedroom fan/light....
entryway lights... by library door

and bathroom lights...
fans and lights are rather fun to choose.

The House of Plunder

My sister had this guy working for her for a weekend... can't remember his name... but he helped by cleaning up plaster she was wacking around all over the place... and he informed us that there as a magical place out in Iuka, Illinois called the House of Plunder. 

Of course, being adventurous... we found the House of Plunder on weekend... they are only open on Friday and Saturday.

So, anyway there is this older fellow and his adult children who run the House of Plunder which is a massive thrift store with mostly building materials on sale... that the guy has probably purchased at auctions and closeouts.

The House of Plunder dude informed us... on the last visit... that he has a House of Plunder furniture outlet.. hahah... next to the Iuka post office.. which of course I HAD to visit.. and I found this treasure.... and bought it for 20 bucks. ... What a steal, right?

Now, I know what you're thinking... what the heck is she going to do with this....

Right....

Well, my thought was to turn it into a "booksafe"... stick some shelves inside to house some of the book collection.

I put a new back on... and bottom.... and filled in the doors with some pieces of luan...
So, I decided to use some metal roof flashing and give it a vintage pie safe look....I poked a lot of holes in the flashing using a hammer and nail.... used a lot of Liquid Nail to glue down the edges onto the wood... trimmed it up...  

and painted it.... and I got free paint at Ace Hardware because I discovered they were giving away free quarts of paint during the month of March... every Saturday... so that was cool to paint it up for free... and I used the sponge painting technique.... and here it tis.... doesn't have inside shelves yet... but will do those in a couple weeks.

It will reside in the dining room on the wall between the windows...


This picture shows it almost completed... but you get the idea.... will put up more pictures after I get the shelves inside.


Upstairs Bathroom Spruce Up

Somehow I made this major decision that the upstairs bathroom needed finishing first... so that I could eliminate the bathroom facilities on the 1st floor. I had to get the hot water heater and a furnace in the 1st floor bathroom area so I could actually have some running water and not have to haul in water every visit.... AND get some heat up in the Beast before next winter because I promised the Beast some heat. To do all of this though I need that first floor bathroom area.... thus, the upstairs bathroom needed to work.

Let us review what the upstairs bathroom looked like before I did anything .....

Now, I know what you are thinking....

Ewwwwww....


I know... I know... pretty sad... huh?


Can it get any better than this?


So, anyway.... I work slow... and it took me a couple months to get it all together.... but another TaDa moment brought to you by me.

and yes... if you are wondering... I DID sew up my own shower curtain.... made a window curtain to match but it made the room too dark so I believe I will stick with a paper shade or a mini blind.


Rick, the world's greatest jack of all trades, set my toilet in place this weekend for me and redid most of my plumbing.... (still have to replace bathtub faucets... and I have to special order a vanity drain)... but I think the toilet came out great... doesn't even look like the same one does it?


My theme in the bathroom is Giraffes.... I have no idea why... I was inspired by a giraffe switchplate for the lightswitch..... go figure... but the giraffe theme complements the earth tones and the beige tile.... thus, I am happy with it all.

Rick also hooked up the faucets to the vanity.... of course, as I said I still have to special order the drain...

I repurposed a cabinet I found at the Salvation Army ... which I got for a few bucks... and made it into the base for the vanity....

OH.... did I mention that ALL the little inch square tiles are from my sister's house that she is renovating which is around the corner and down a couple blocks from the Beast. I kept all the tiles I tore out of her bathroom... the inch tiles were on her bathroom floor... they were all popping up so I scooped them up.... took them all home... and got some mesh at JoAnn's and glued them all back into appropriate shapes and lengths I needed for my artsy tile type work.


I still have to scrape paint off the window woodwork... but bathroom is definetly looking better than it did... and truly.... really.... sometime in April.... maybe the first week... fingers crossed... the water WILL be flowing and everything working.

Attic Door Inspiration

What to do with the attic door in the upstairs hallway.  Just a regular sized door with the attic ladder attached stuck in the ceiling.....

Major inspiration required me to decide the stairwell, landing, upstairs hallway and back stairs will be my Americana area.... thus, I began the Americana theme with my attic door.

Turned out fairly artsy... if I do say so myself..

A Promise to be a Better Blogger

Soooo... OK, I have not been true to the blog... I admit I slowed down but, perhaps things are actually getting done and perhaps I DO have things to report for the Beast.

Recently I discovered that the closet at the head of the stairs was not an original part of the house...wasn't supposed to be there.... and I discovered this fact when I attempted to pull off that lasssssst piece of ugly paneling that was on the side wall of the closet. Pulling it off uncovered new studs.... and drywall on the inside of the closet instead of plaster. Upon further inspection I realized that the dreaded past home owners had stolen the landing area with an ugly closet.

Of course.... I ripped that sucker out... and without the help of my sister, El Destructo, because it was cold... and wintery ... and she had some gall bladder surgery and wasn't in shape to tear up my house.

Anyway.... here's a before picture.... kinda before.... during destruction...

After destroying the closet I set about attempting to find a handrail that would match the old rail.... and find balusters to match the three that were intact. I found 4 old ones down in the creepy basement.... and no luck matching them up... guess they are too old of a pattern. By the way, it costs a fortune to have someone mill your existing balusters... and since I am fairly cheap.... an expensive fix was out of the question.

I did find plain balusters and a handrail that matched fairly well from Home Depot's vendors.

Then, as usual, I found Rick the master carpenter and had him restore my landing with my new parts....

Rick is so very skillful.....


and......


wait for it......


here it comes.....


are you ready.....


Ta Da.....

Love it... love it...

Looking forward to scraping paint off the rest of the stairway... and maybe getting it stained and varnished this summer...

let's all keep our fingers crossed.